Hello, it’s been a little longer since the last post than I anticipated, as I’d hoped to have a few more things finished to show you all. Now I’ve gone and waited so long that this is likely to be a slightly longer post than usual. There are two things I want to show you, both of which we’re quite excited about, so I’m going to jump right in so I can get to some pictures!
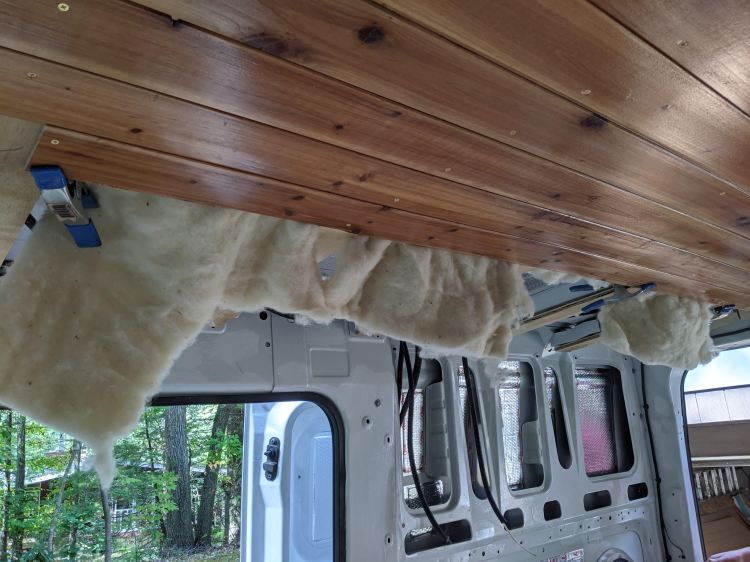
First things first, remember that beautiful future ceiling from the last post? Well, we finally got it up and I have to say, these pictures don’t do it justice. We weren’t thrilled about having to put so many screws in it, but we used brass ones at the recommendation of Matt’s parents and it did turn out quite well. It feels so good to have something completely finished. There are so many things in various stages of construction right now, so having the ceiling done is motivating and is going a long way in making this all feel more real.
I’m not sure if I’ve mentioned yet that we’re using sheep’s wool insulation. You can’t use adhesive with it, so many people hold it in place with string to prevent it from shifting or falling out of the ceiling and walls. We opted to just work in sections instead, shoving the wool batts between the ceiling and the roof as we went. I’m not sure if we’ll be able to take a similar approach when we get to the walls, but at least for the ceiling this was more efficient.

With the ceiling up and the final frame pieces for the fan and the vent in place, all that’s left is to pop in the overhead lights!

The other thing I want to show you all is the backsplash I made for the van kitchen. I found this idea when I was searching for mountain mural tutorials after seeing one someone had painted in their house. This friend had stuck to muted colors (think misty morning mountains), and my initial thought was that a mural could be a good way to have a little fun with the van interior without overwhelming such a small space. Once we decided to set in the walls a bit wherever we could to maximize usable space though, I had to scratch the mural idea. I decided instead to go with another idea that kept popping up. This one was for a DIY mountain wall hanging made from small strips of wood.
A little side note here, if any of you have looked much online at other people’s campervans, you’ve likely seen how many people use a lot of natural wood in their build. Matt and I both like how that looks, but we’re trying to be mindful of how much weight we’re adding so as not to overload the van by the time we’re done. We’re using thin, lightweight paneling on the walls, and probably would have done something similar on the ceiling had we not pulled the cedar from the dumpster. Given that there won’t be quite as much natural wood in our van as we’d like, getting a little more in as a backsplash was all the more appealing.
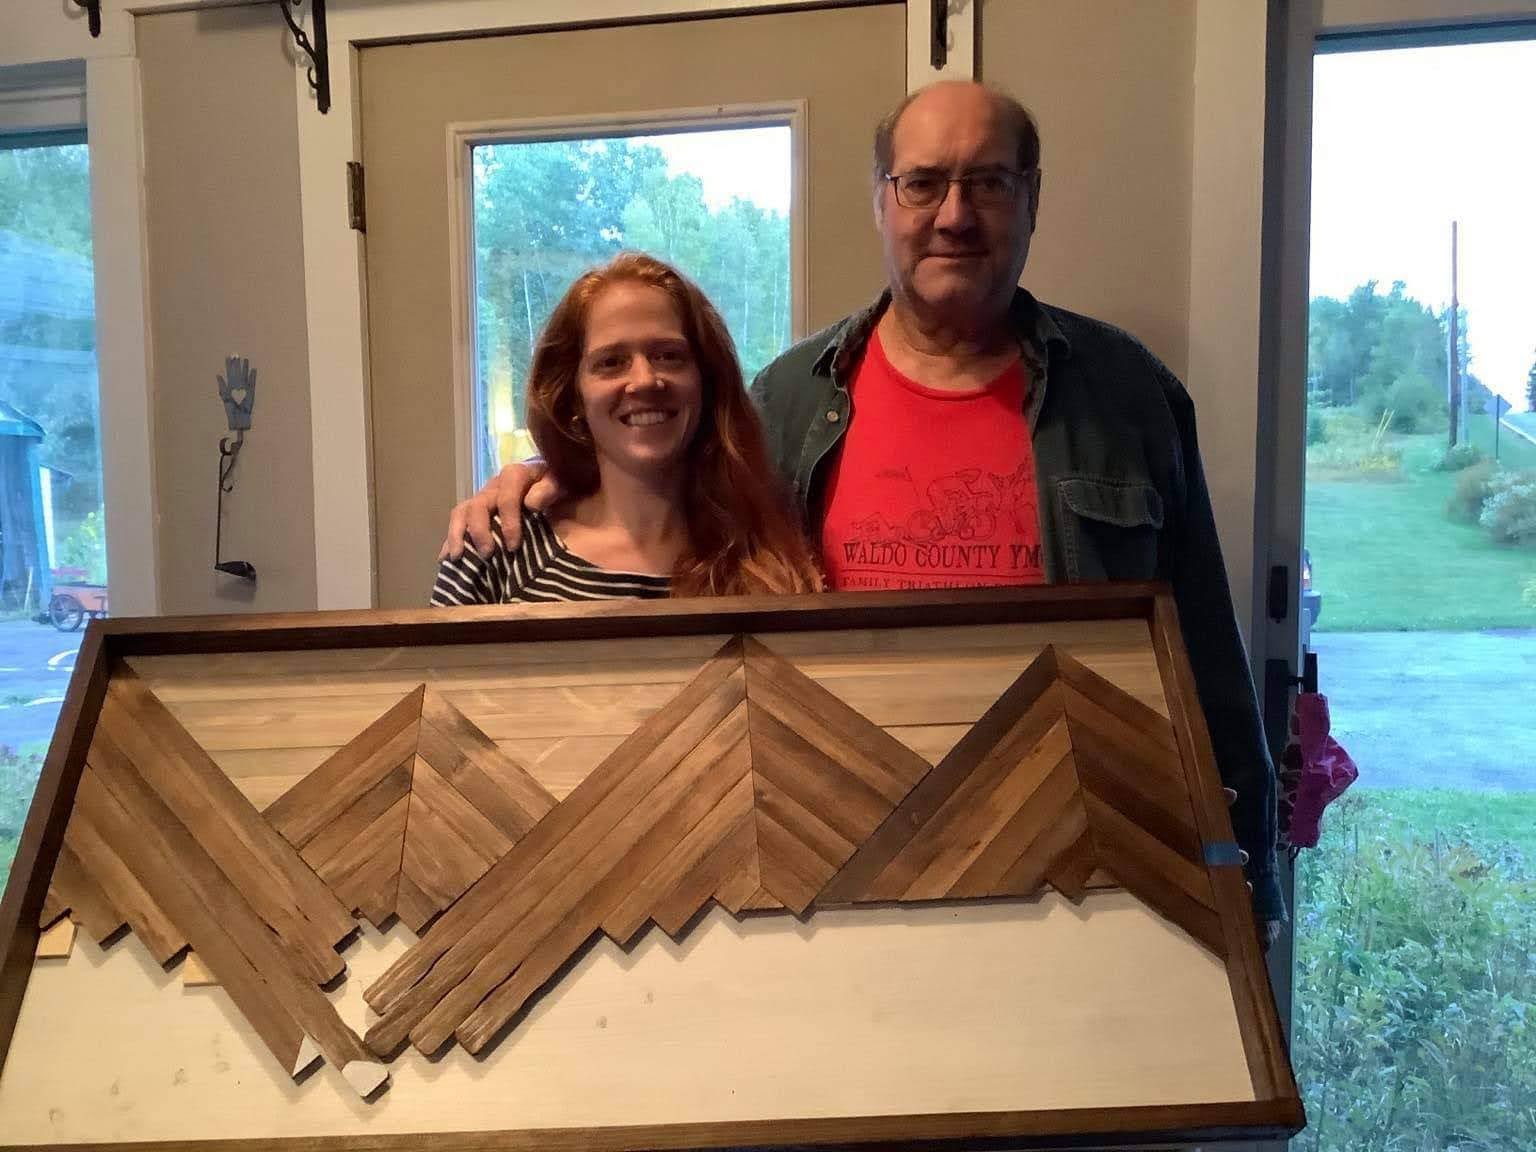
Last week I drove to Maine to spend several days with my parents. I’d intended to show up and surprise my mom on her birthday, but as I gathered together all the projects I planned to bring with me I realized she and my dad deserved a heads up! Until now, all of the work on the van had been done at either our apartment or Matt’s parents’ house, so I was excited to have a few things to work on with my family to get them involved as well.
The backsplash was truly a group effort, between my dad’s troubleshooting and taking the time to help me get everything cut, Emma brainstorming a few aspects of it with me, and my mom providing some sanity checks and helping me get it assembled as I ran out of time. There was a slight delay in getting started, because when I tested the stain on the wood I had intended to use it didn’t take very well at all. I ended up picking up some long paint sticks instead, the ones you use for 5-gallon buckets, along with a few strips my dad cut for me when those ran out.


Overall this didn’t take quite as long as I was worried it might, thanks to my dad’s help getting everything cut and my mom’s help getting the pieces back into the correct arrangement. It was a little tedious making sure the back of each piece was clearly labeled, but I figured that was better than running the risk of things getting mixed up and then taking longer to reassemble.

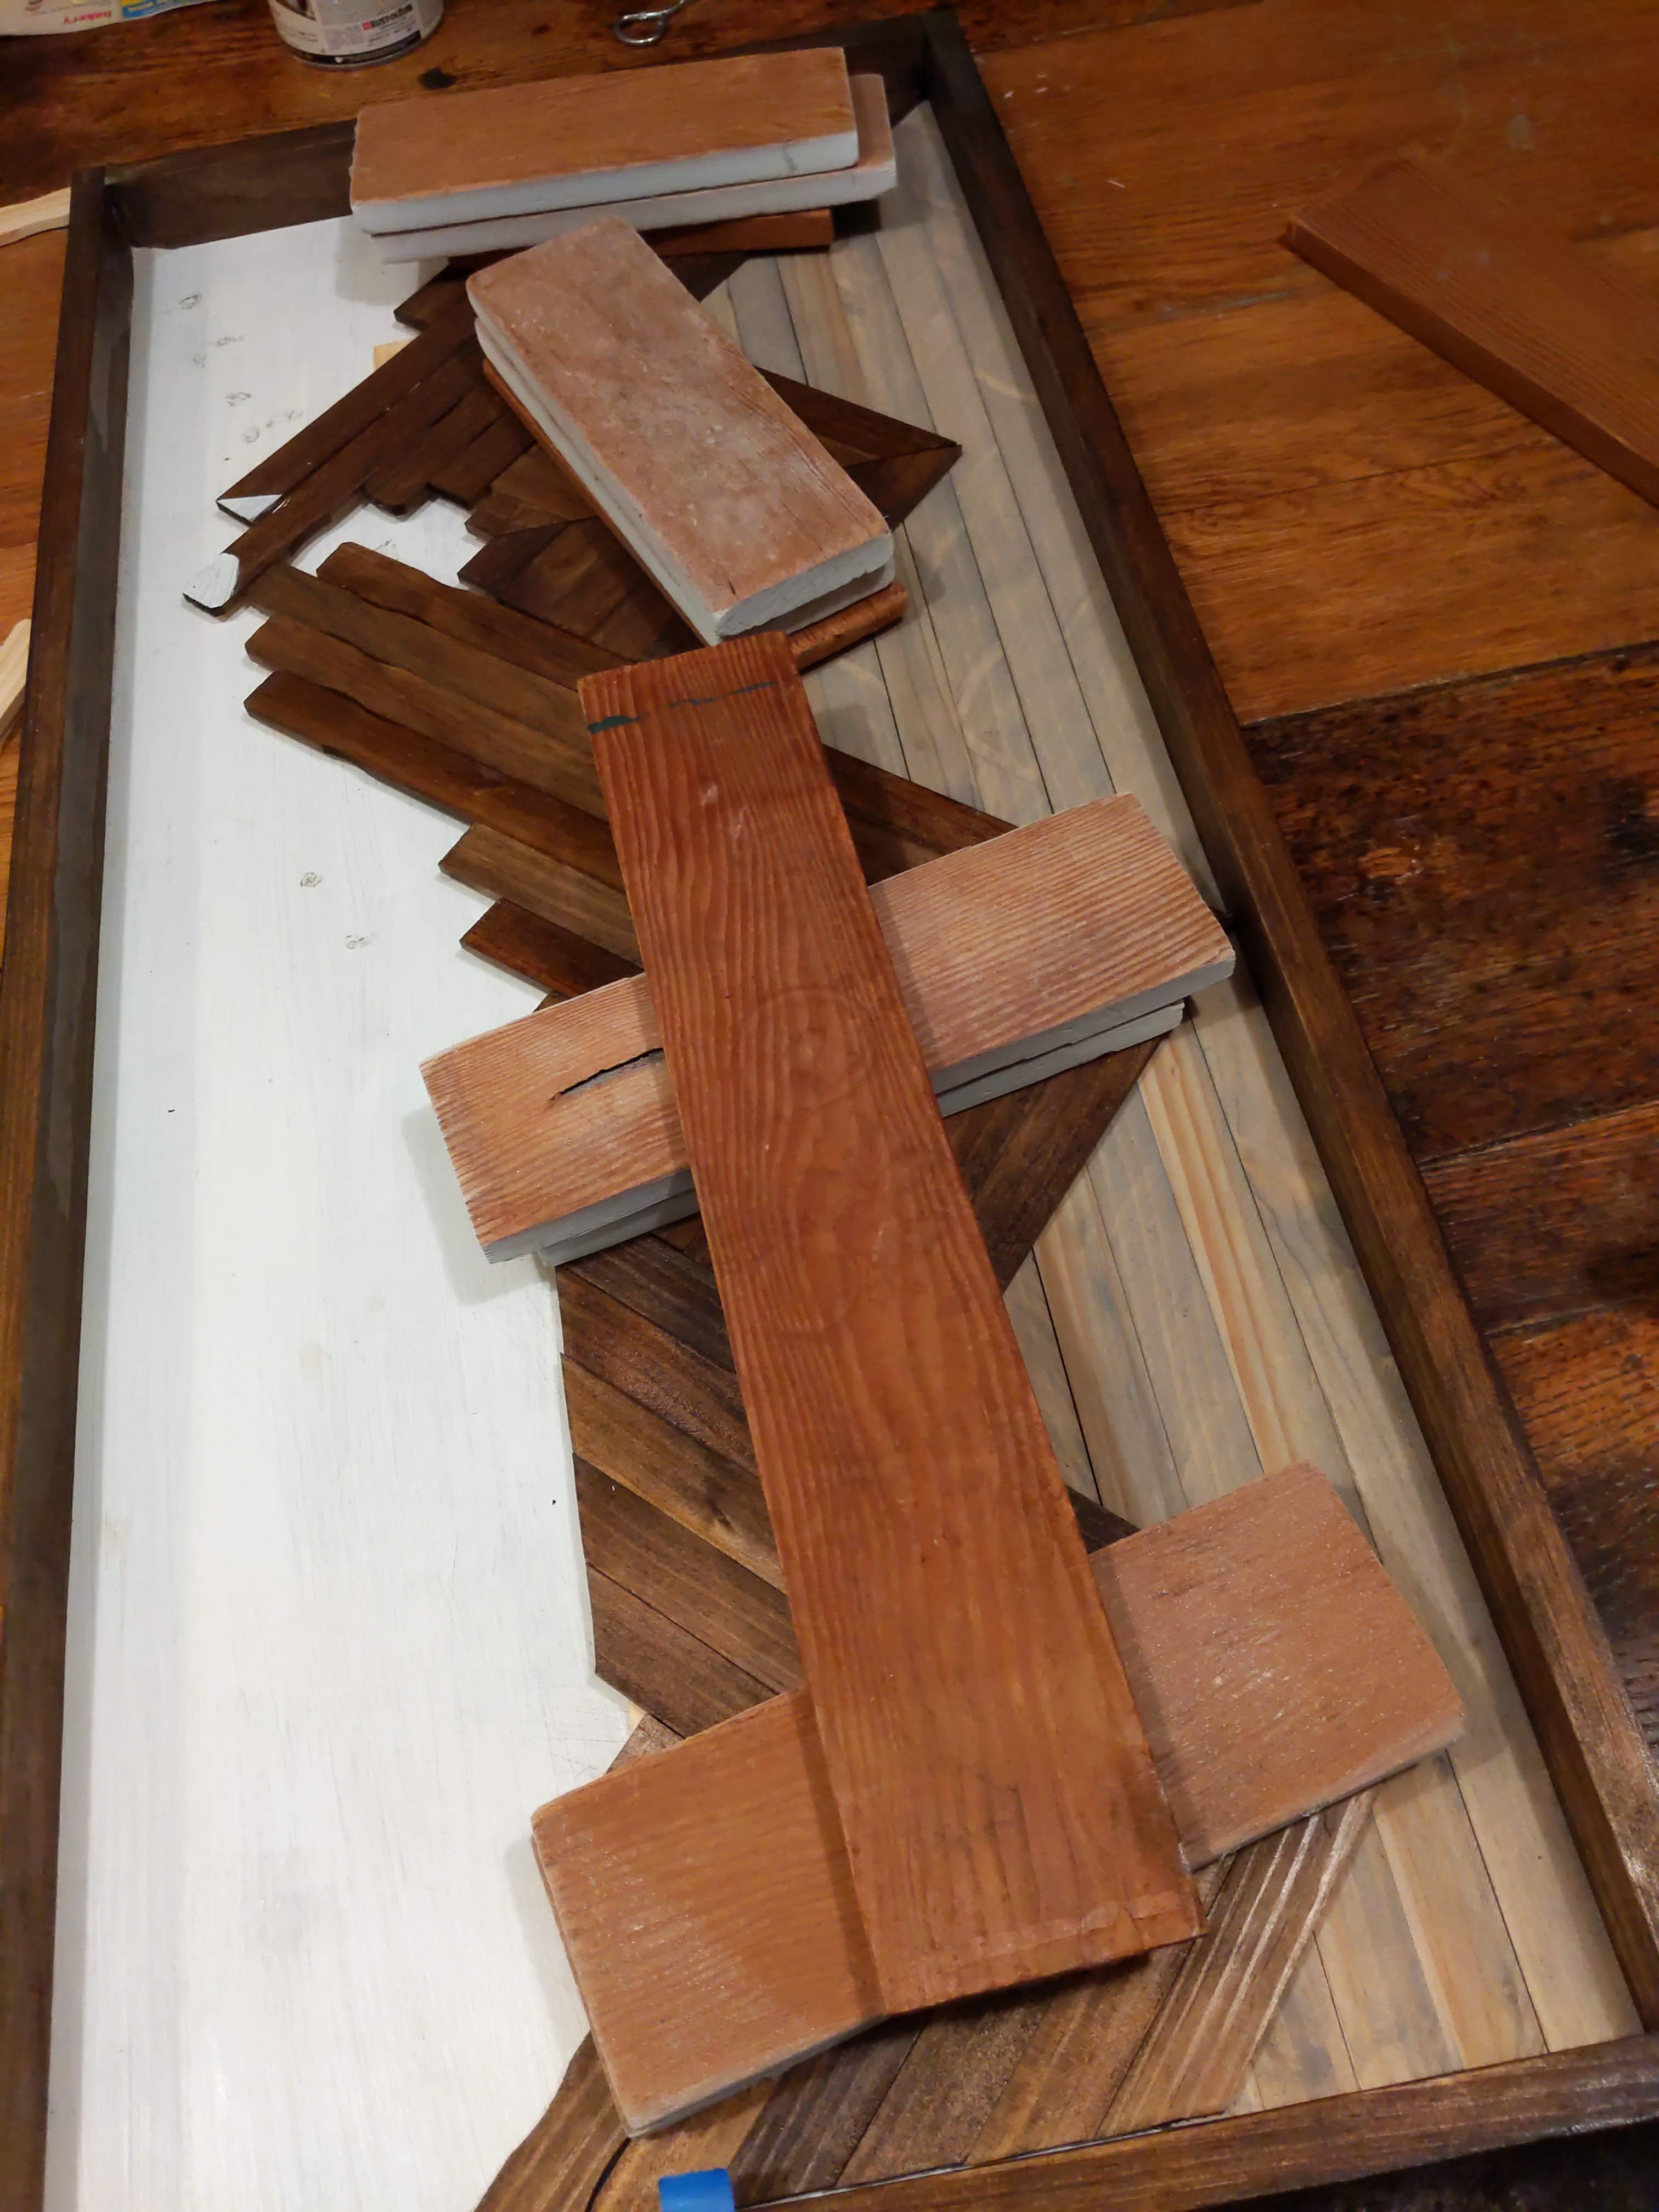
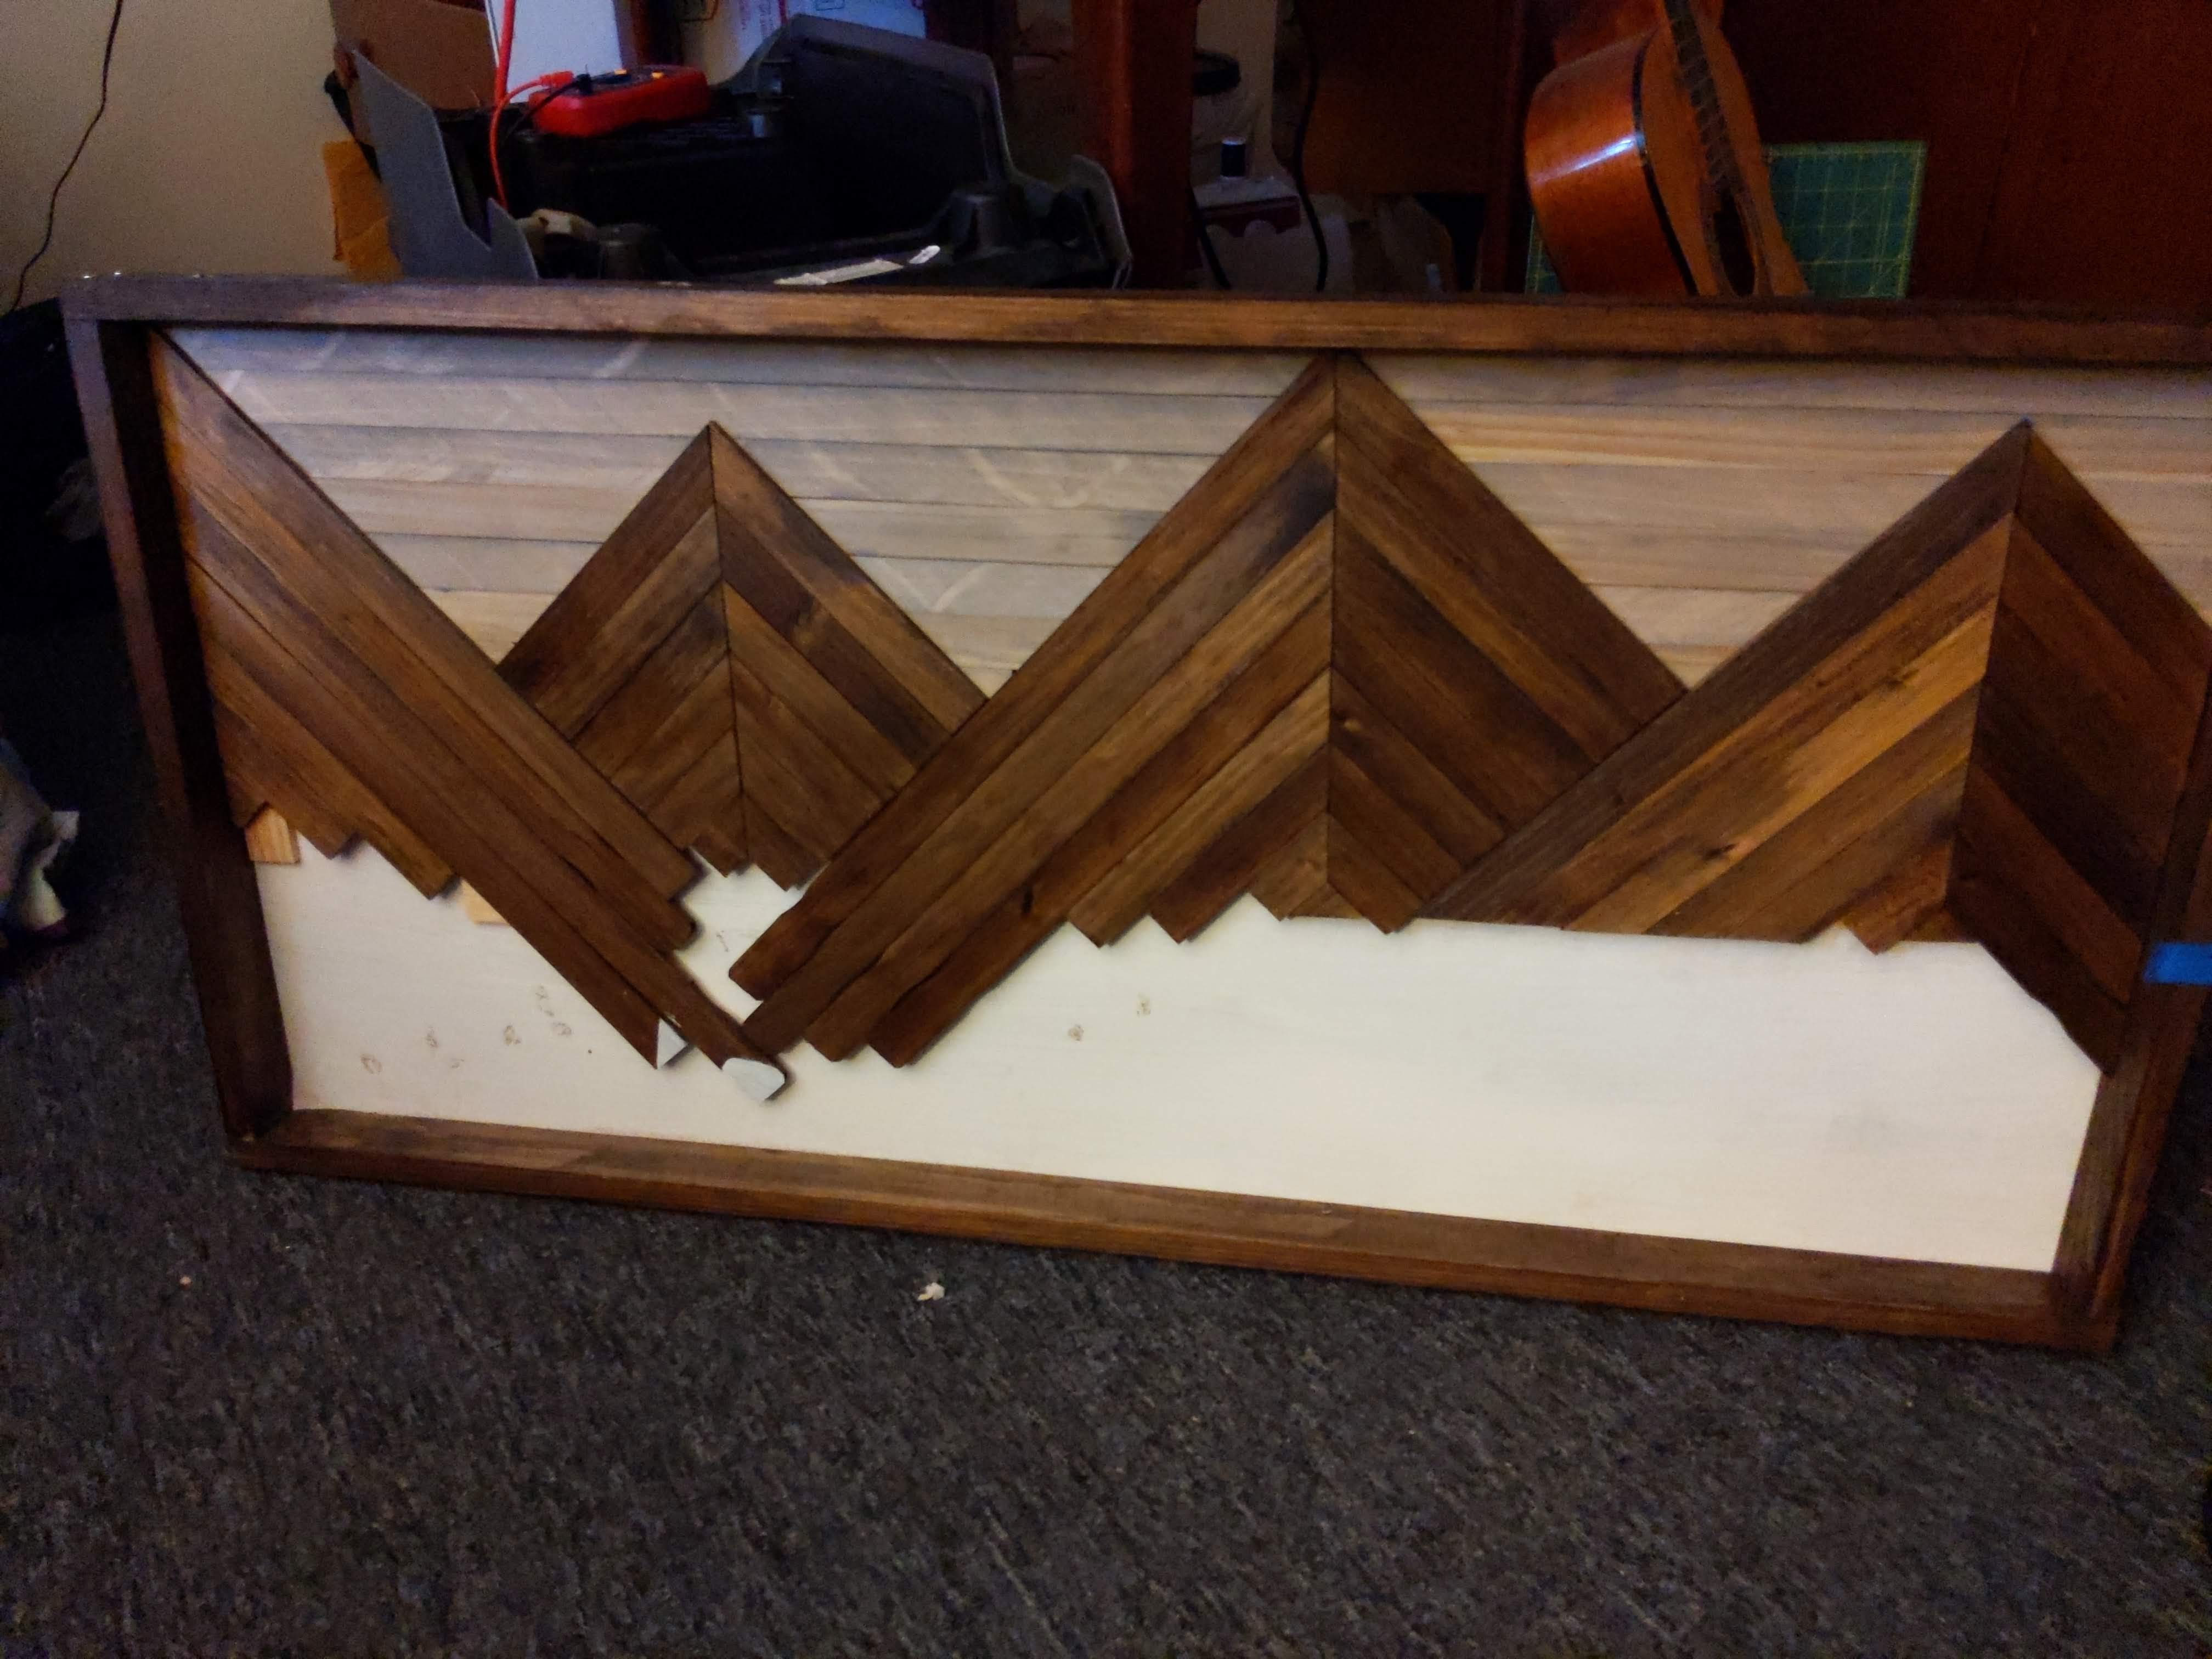
Because of where this is fitting into the wall, only about half of this framed section will be visible, hence the mountains not going all the way to the bottom. I marked on the frame where the countertop will hit (you can see the blue tape on the side) and went a few inches below that. Going much lower than I did would have added unnecessary weight.
I brought it back to the apartment like this and have been putting a few coats of poly on it this week. Hopefully it will be going in the van sometime in the next week or two, I’ll be sure to share another picture once it’s in!

Nice work all round, Annie! Can hardly wait to see the backsplash installed. Aunt Aline
LikeLiked by 1 person