It should come as no surprise that one of the most important parts of a van build is the insulation. Cargo vans simply aren’t designed to be comfortable anywhere but the cab, let alone lived in. Our wool insulation seems to be working well everywhere we were able to use it, but we still needed to do something about our windows, the biggest weak spots we had left. Unless their build includes a wall between the cab and the living space, most van-dwellers hang a heavy curtain there for privacy and/or to keep the heat in the back. We planned to at least sew a blackout curtain, but ideally we wanted something more insulating than that.
My parents have some great thermal curtains in their house. The large ones can get a bit bulky, but they work better than any other thermal curtains I’ve seen. Since I know firsthand how effective it is, I really wanted to use the same material in the van. It’s kind of pricey though, and when I figured out how many yards we’d need to do the large curtain behind the cab as well as small curtains for the little round windows, I was on the fence about whether or not to go for it. Lucky for me, my hesitation ended up paying off.
Shortly before Thanksgiving I told myself I needed to pick an option and go for it, no more indecision. I was leaning towards buying blackout fabric and counting on that sewn onto the fabric I already bought being enough, but I figured I’d double check my measurements and price the thermal curtain fabric one more time. Good thing I did, because the material I wanted was half-off at JoAnn Fabrics! The nearest store only had slightly more than what I needed in stock, so I hopped in the car and was at the store picking it up 30 minutes later.
I hadn’t given any thought to Black Friday sales since Thanksgiving was so low-key this year. For us it was nothing more than a bonus day to work on the van and an excuse to make a pie we ate almost entirely ourselves. Anyway, that’s the longer-than-you-needed story of how I got this fabric to make our curtains.
The first curtain I made was the large one to hang between the cab and the living space. This curtain is nearly complete and is hanging in the van now, the only thing left to do is sew on the rings and thread the string through to make it a roman shade. We’re going to be doing this at my parents’ house next week. My mom just re-did several of their curtains, I’m sure she’s thrilled to be roped into helping us with another 🙂
Now, as some of you already know, our apartment was small. Around 330 square feet kind of small. Think “motel room”, because those are exactly the type of blueprints used in the construction of the building, or so we were told. We had to push all of the furniture to the perimeter, move Matt’s bike into the kitchen, and stack a few things on the bed in order to have enough floor space to lay out the fabrics. Even after doing that, the pieces for the large curtain barely fit in the space we had cleared.
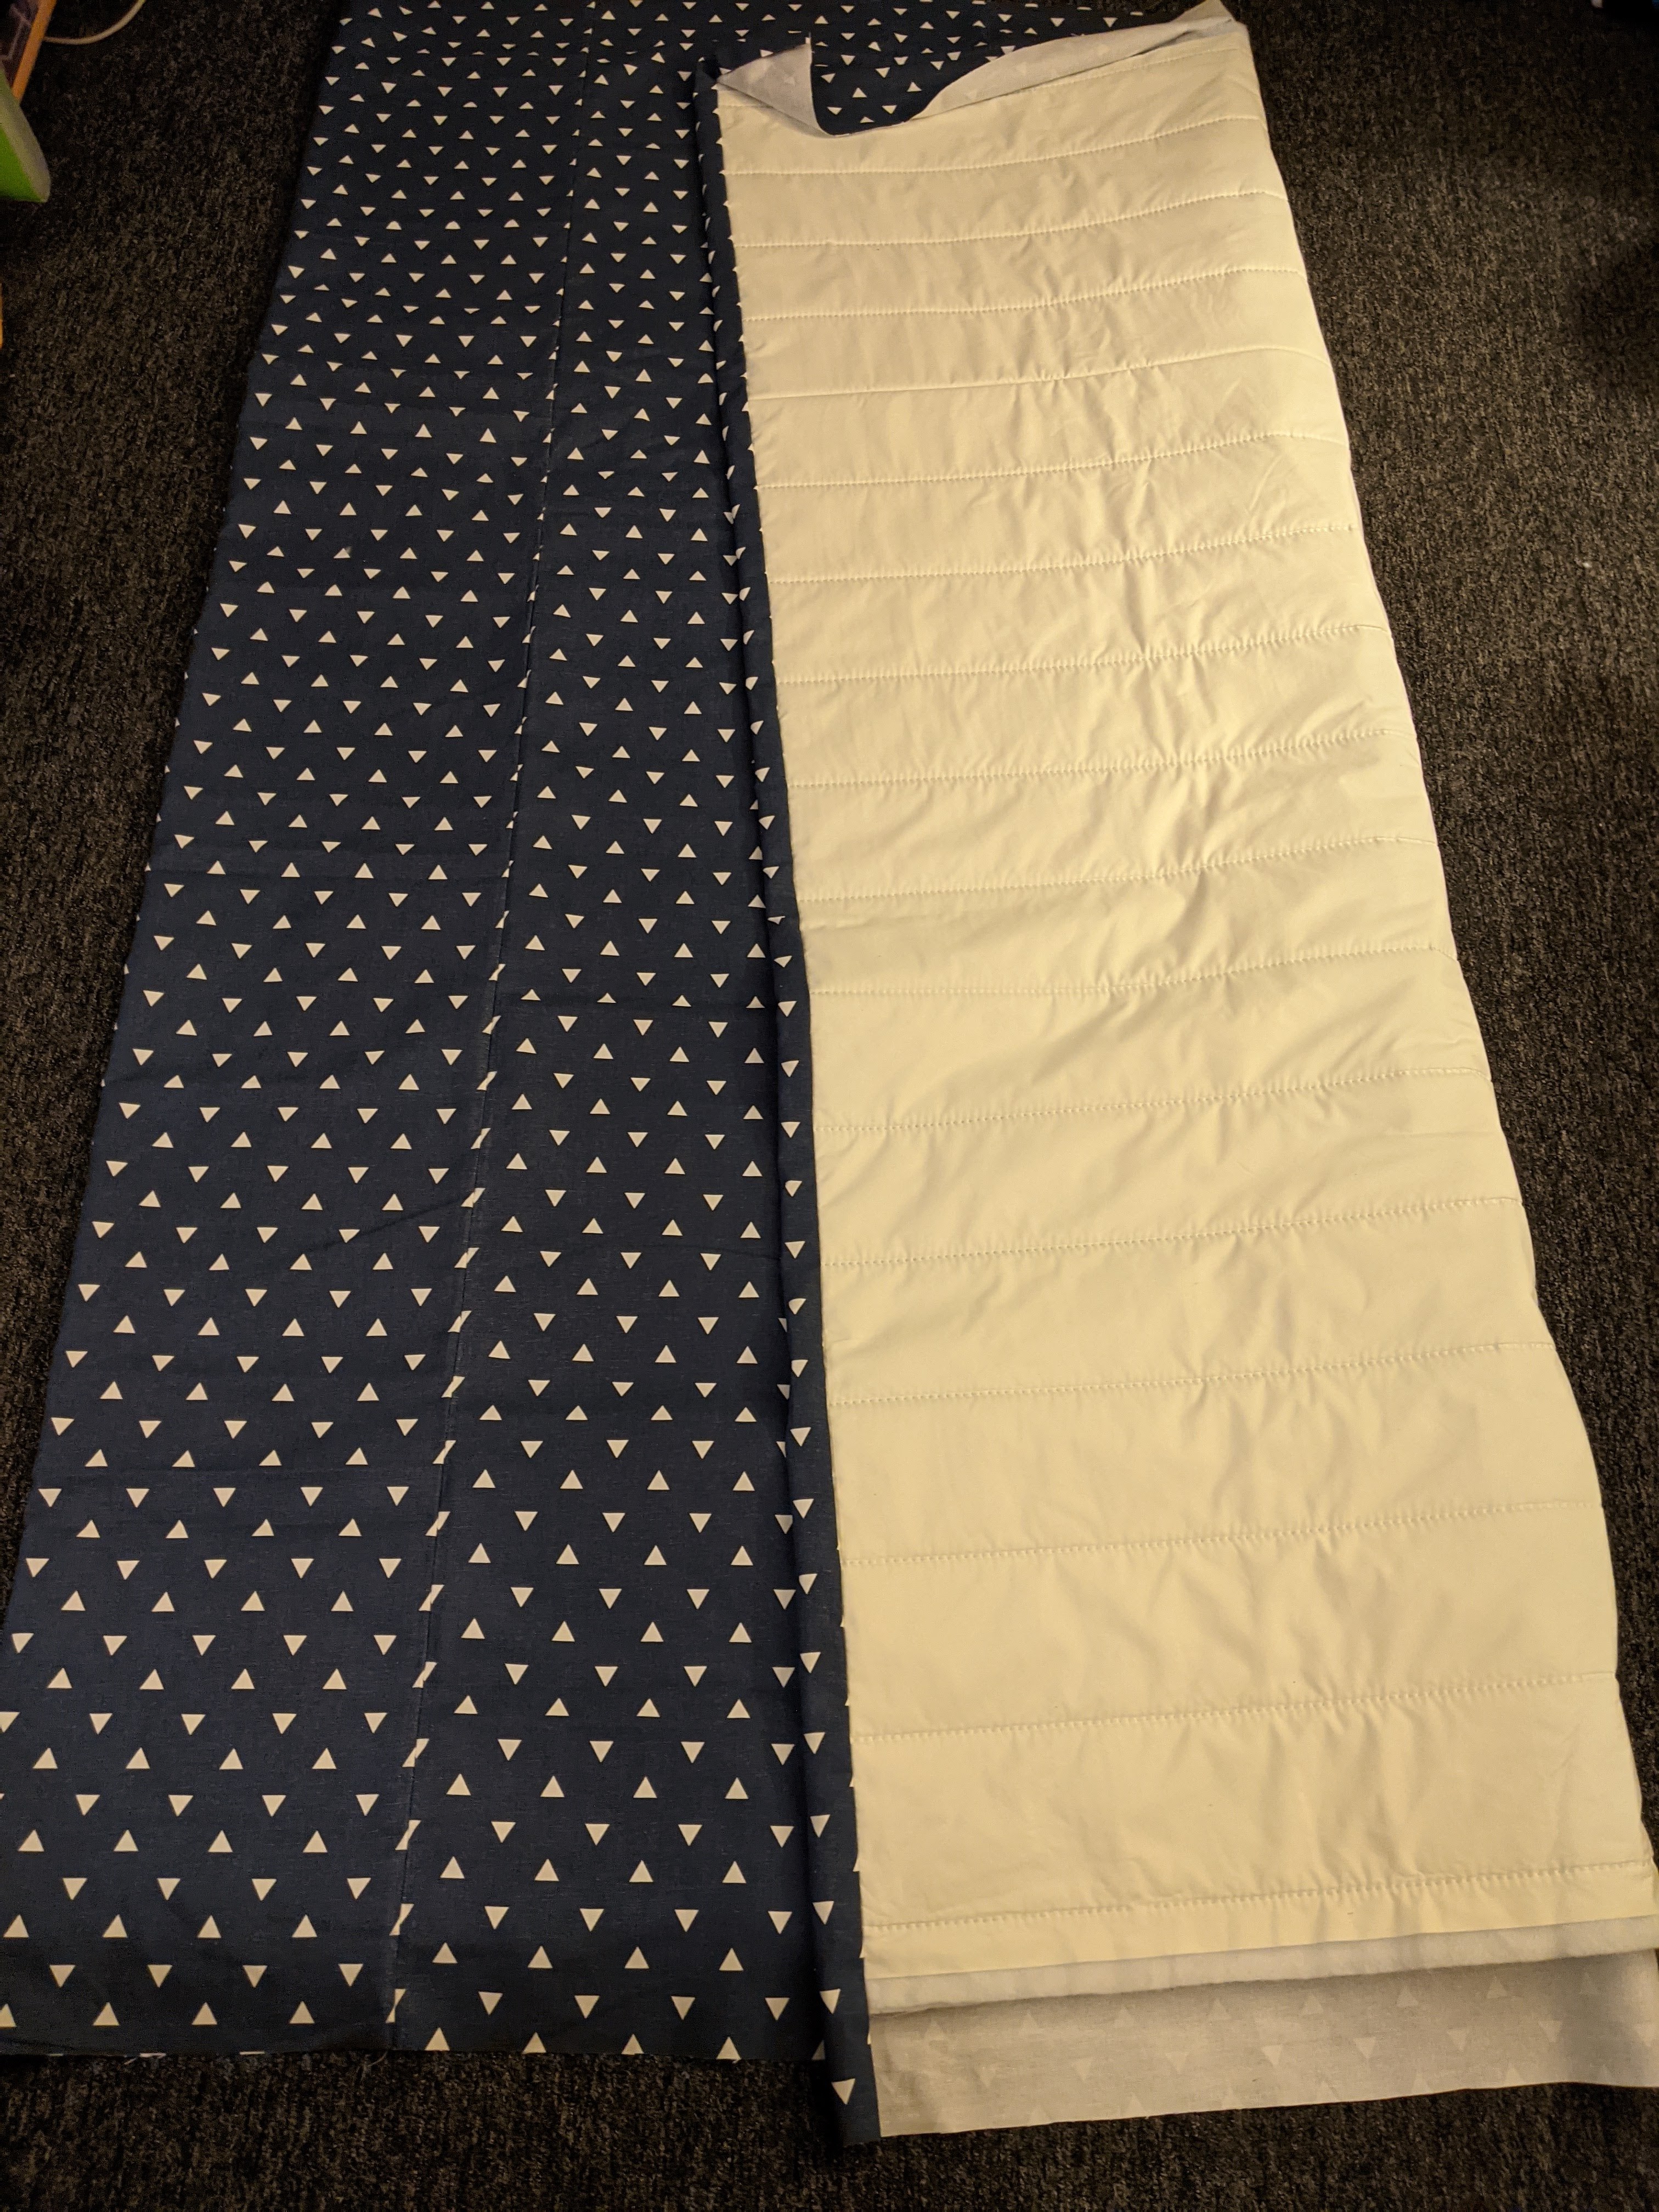
The first time I laid out the blue fabric was a bit of an “oh shit” moment for me/us. I hadn’t anticipated it being as dizzying as it was when it was laid out flat. I had ordered fabric swatches before committing to several yards of anything, but clearly a 3″x5″ piece isn’t the same as browsing in-store. In the picture below, you can kind of see that the pattern is a little different when you look at it from the end compared to if you look at it from the side. It’s not a huge difference, but there is a difference.
After going back and forth several times over which direction to use it, or whether to use it at all, we decided to simply go ahead with whatever was easiest. This was the week before we had to move and we were too tired to keep changing our minds, not to mention we were running out of time to wrap things up.

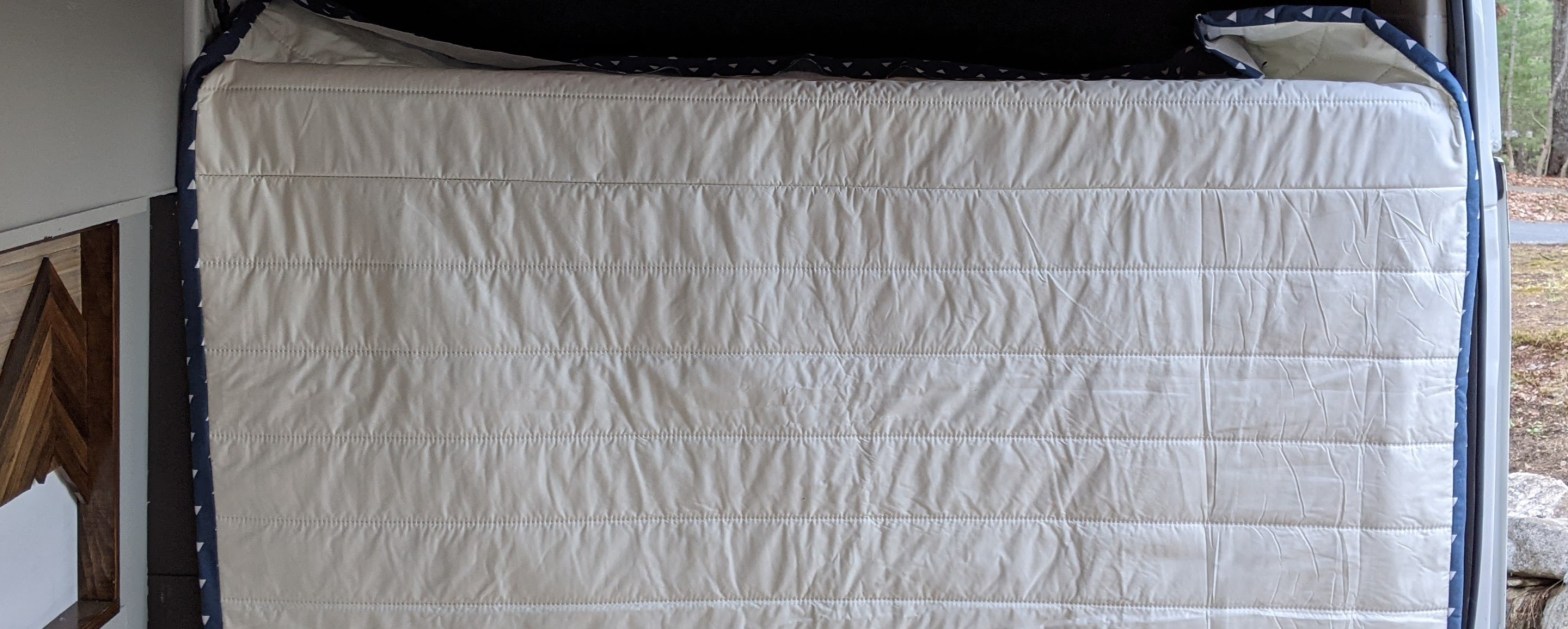
The Warm Company has a great tutorial for how to sew these curtains, so I won’t go into detail on that (if you’re interested you can find the PDF here). The thermal backing fabric is so bulky and awkward to work with that it ended up being a two person job to sew the large curtain. I sat at the sewing machine, while Matt stood beside the table to hold the rest of the curtain and help keep it moving through without the weight of it pulling it out of the machine.
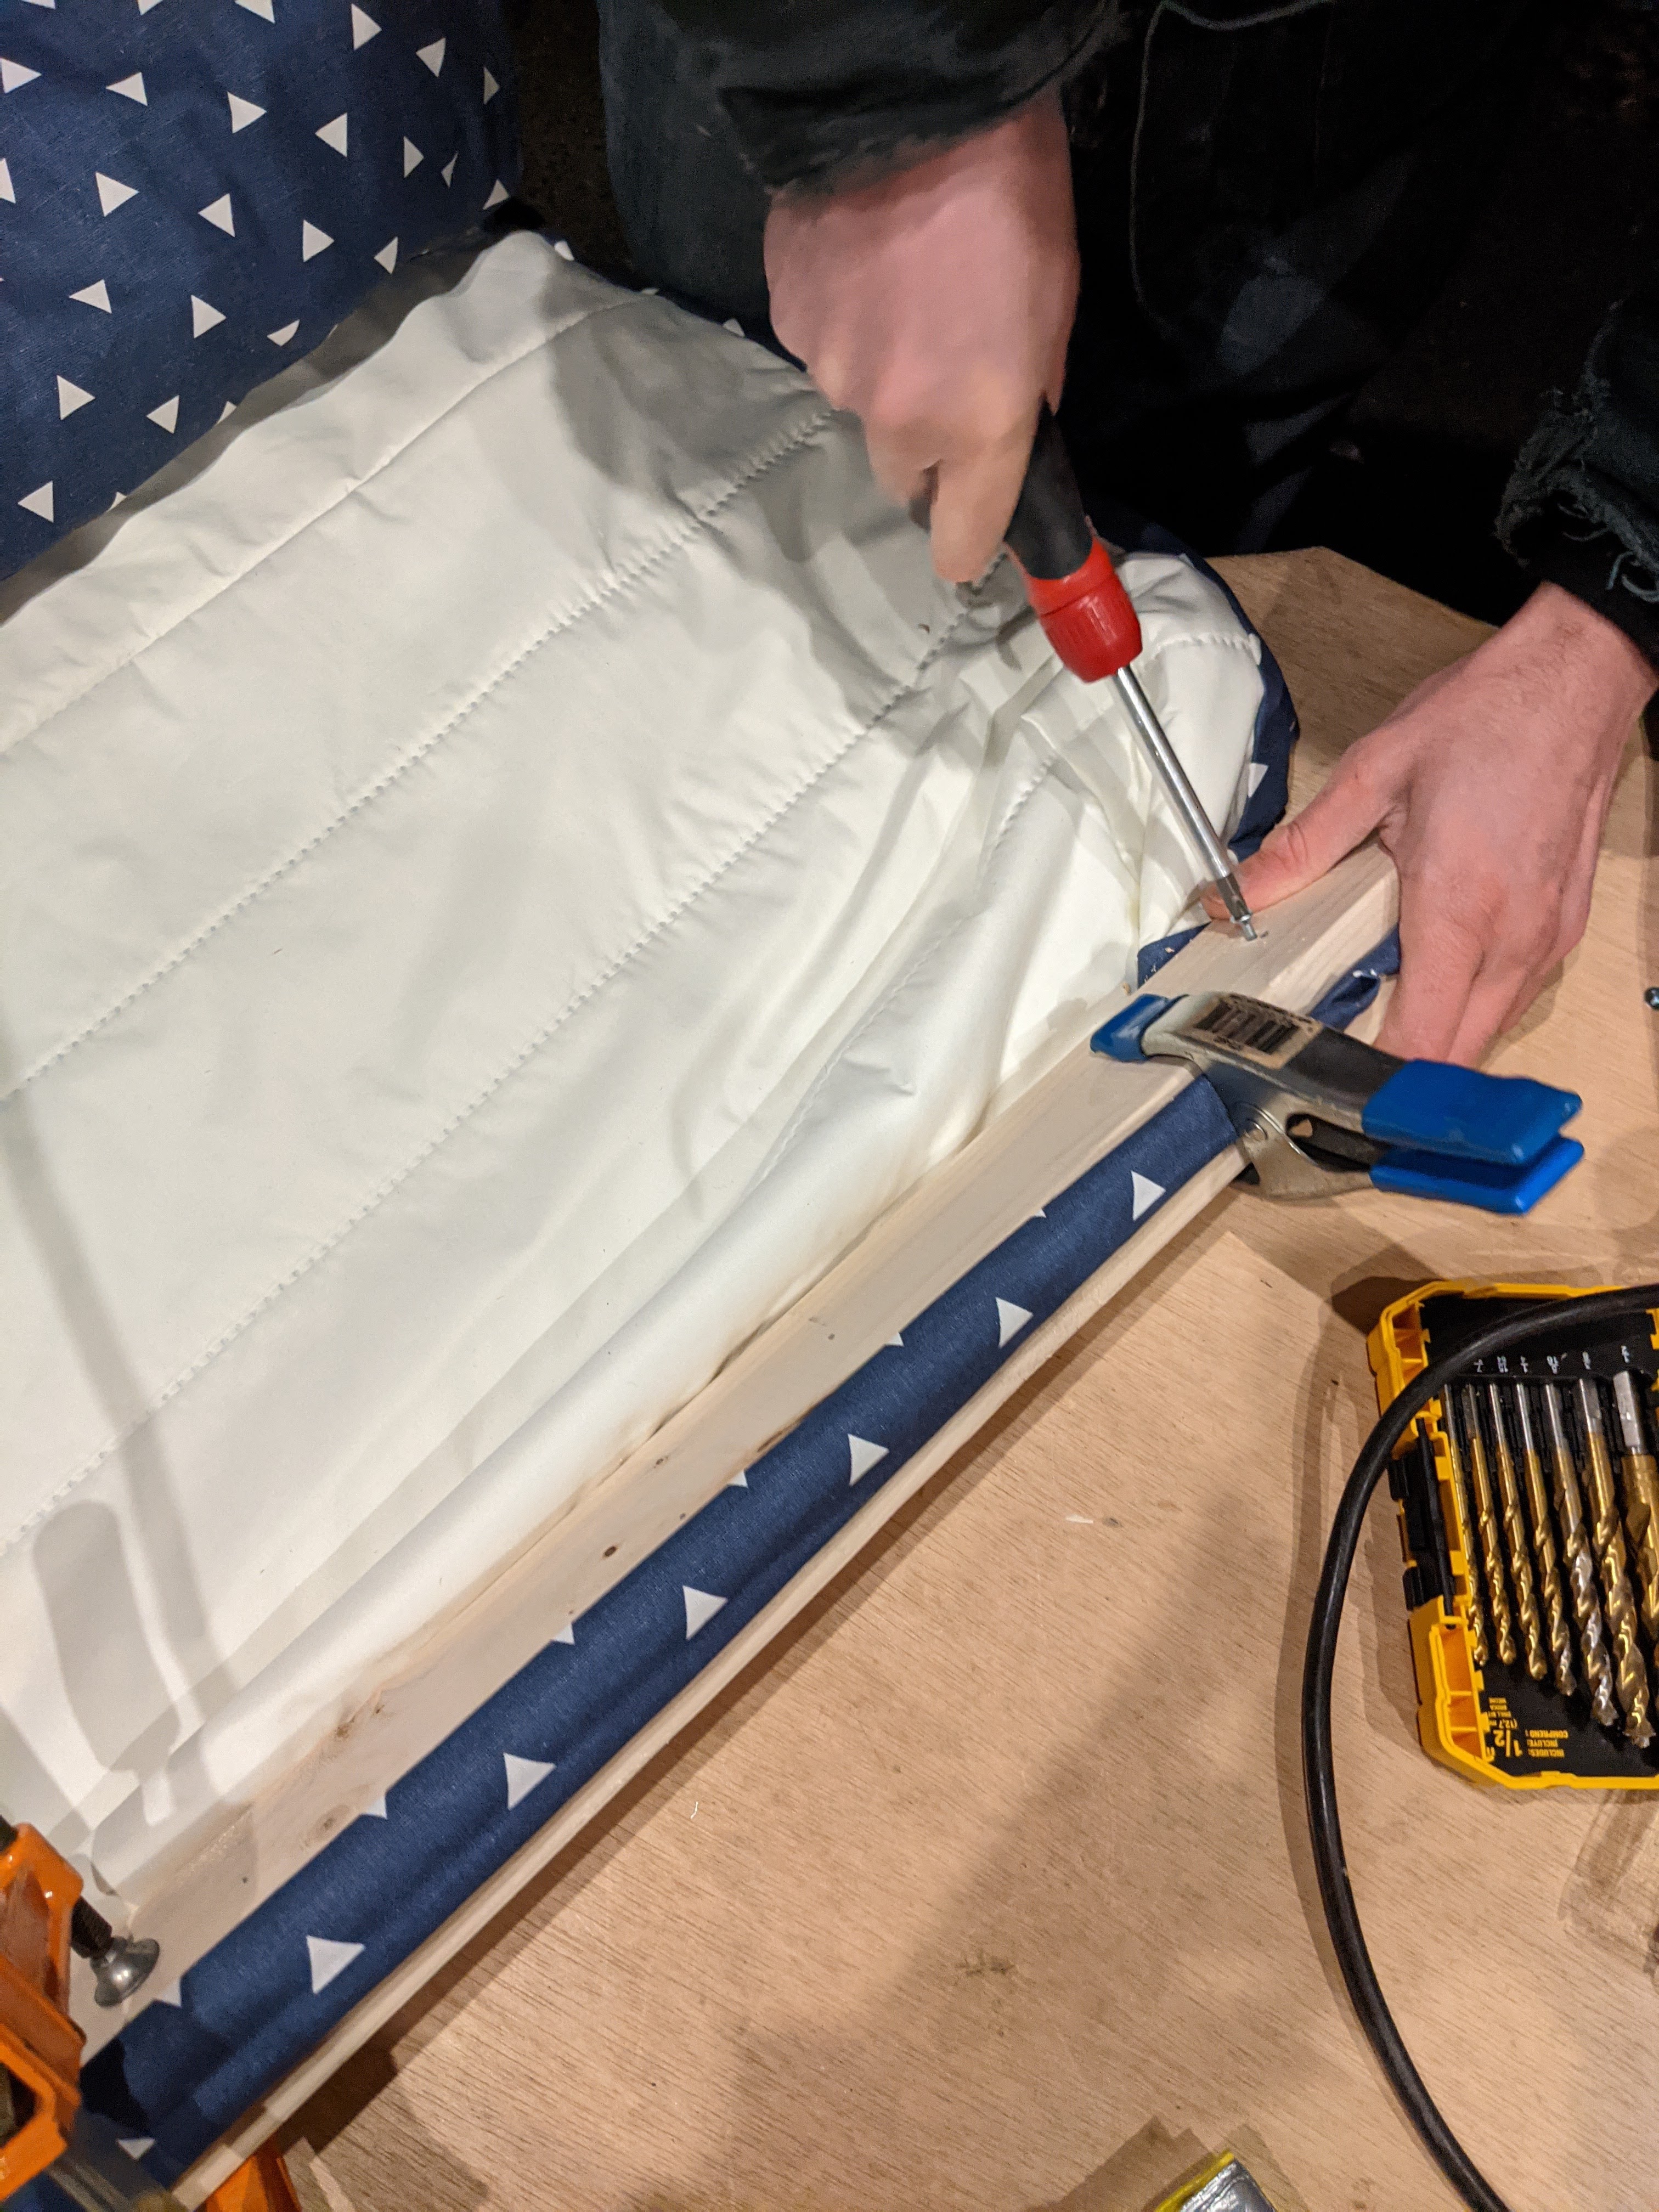
To hang the curtain, we screwed it between two strips of wood that sit on blocks we attached to the walls. We needed something sturdy for the weight of the curtain, and this way we have somewhere to put the eye screws to make this a roman shade.


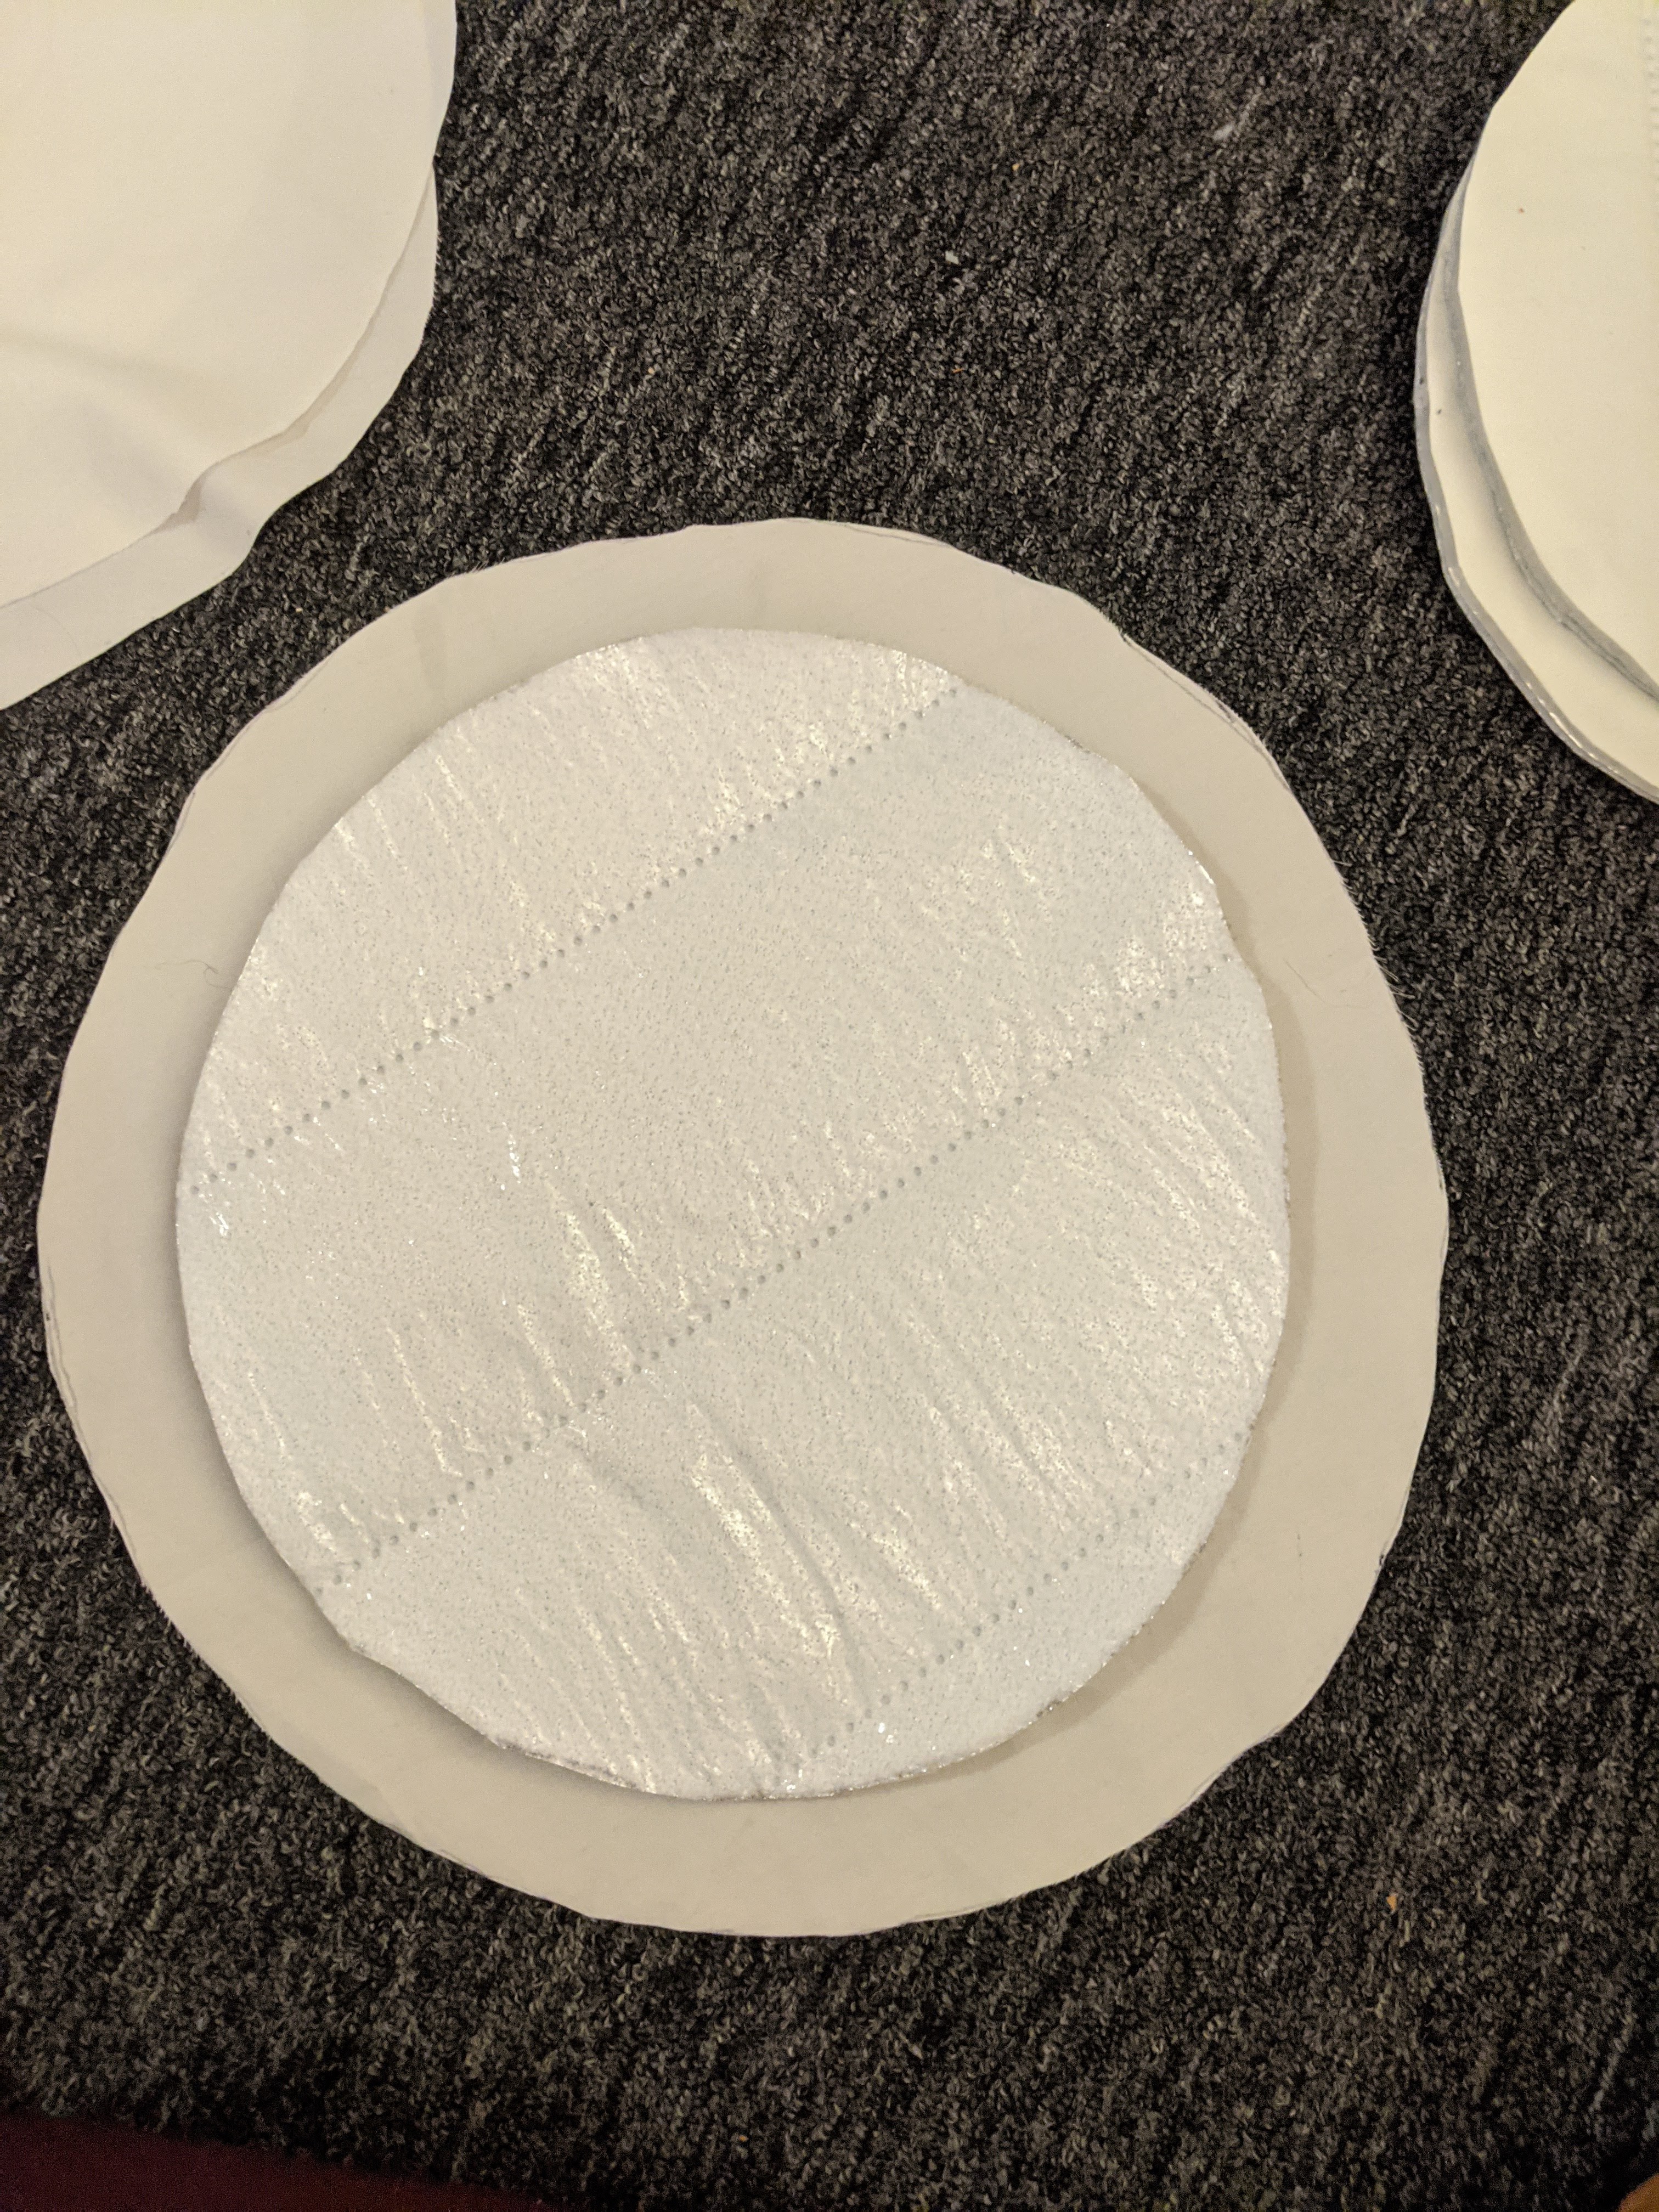
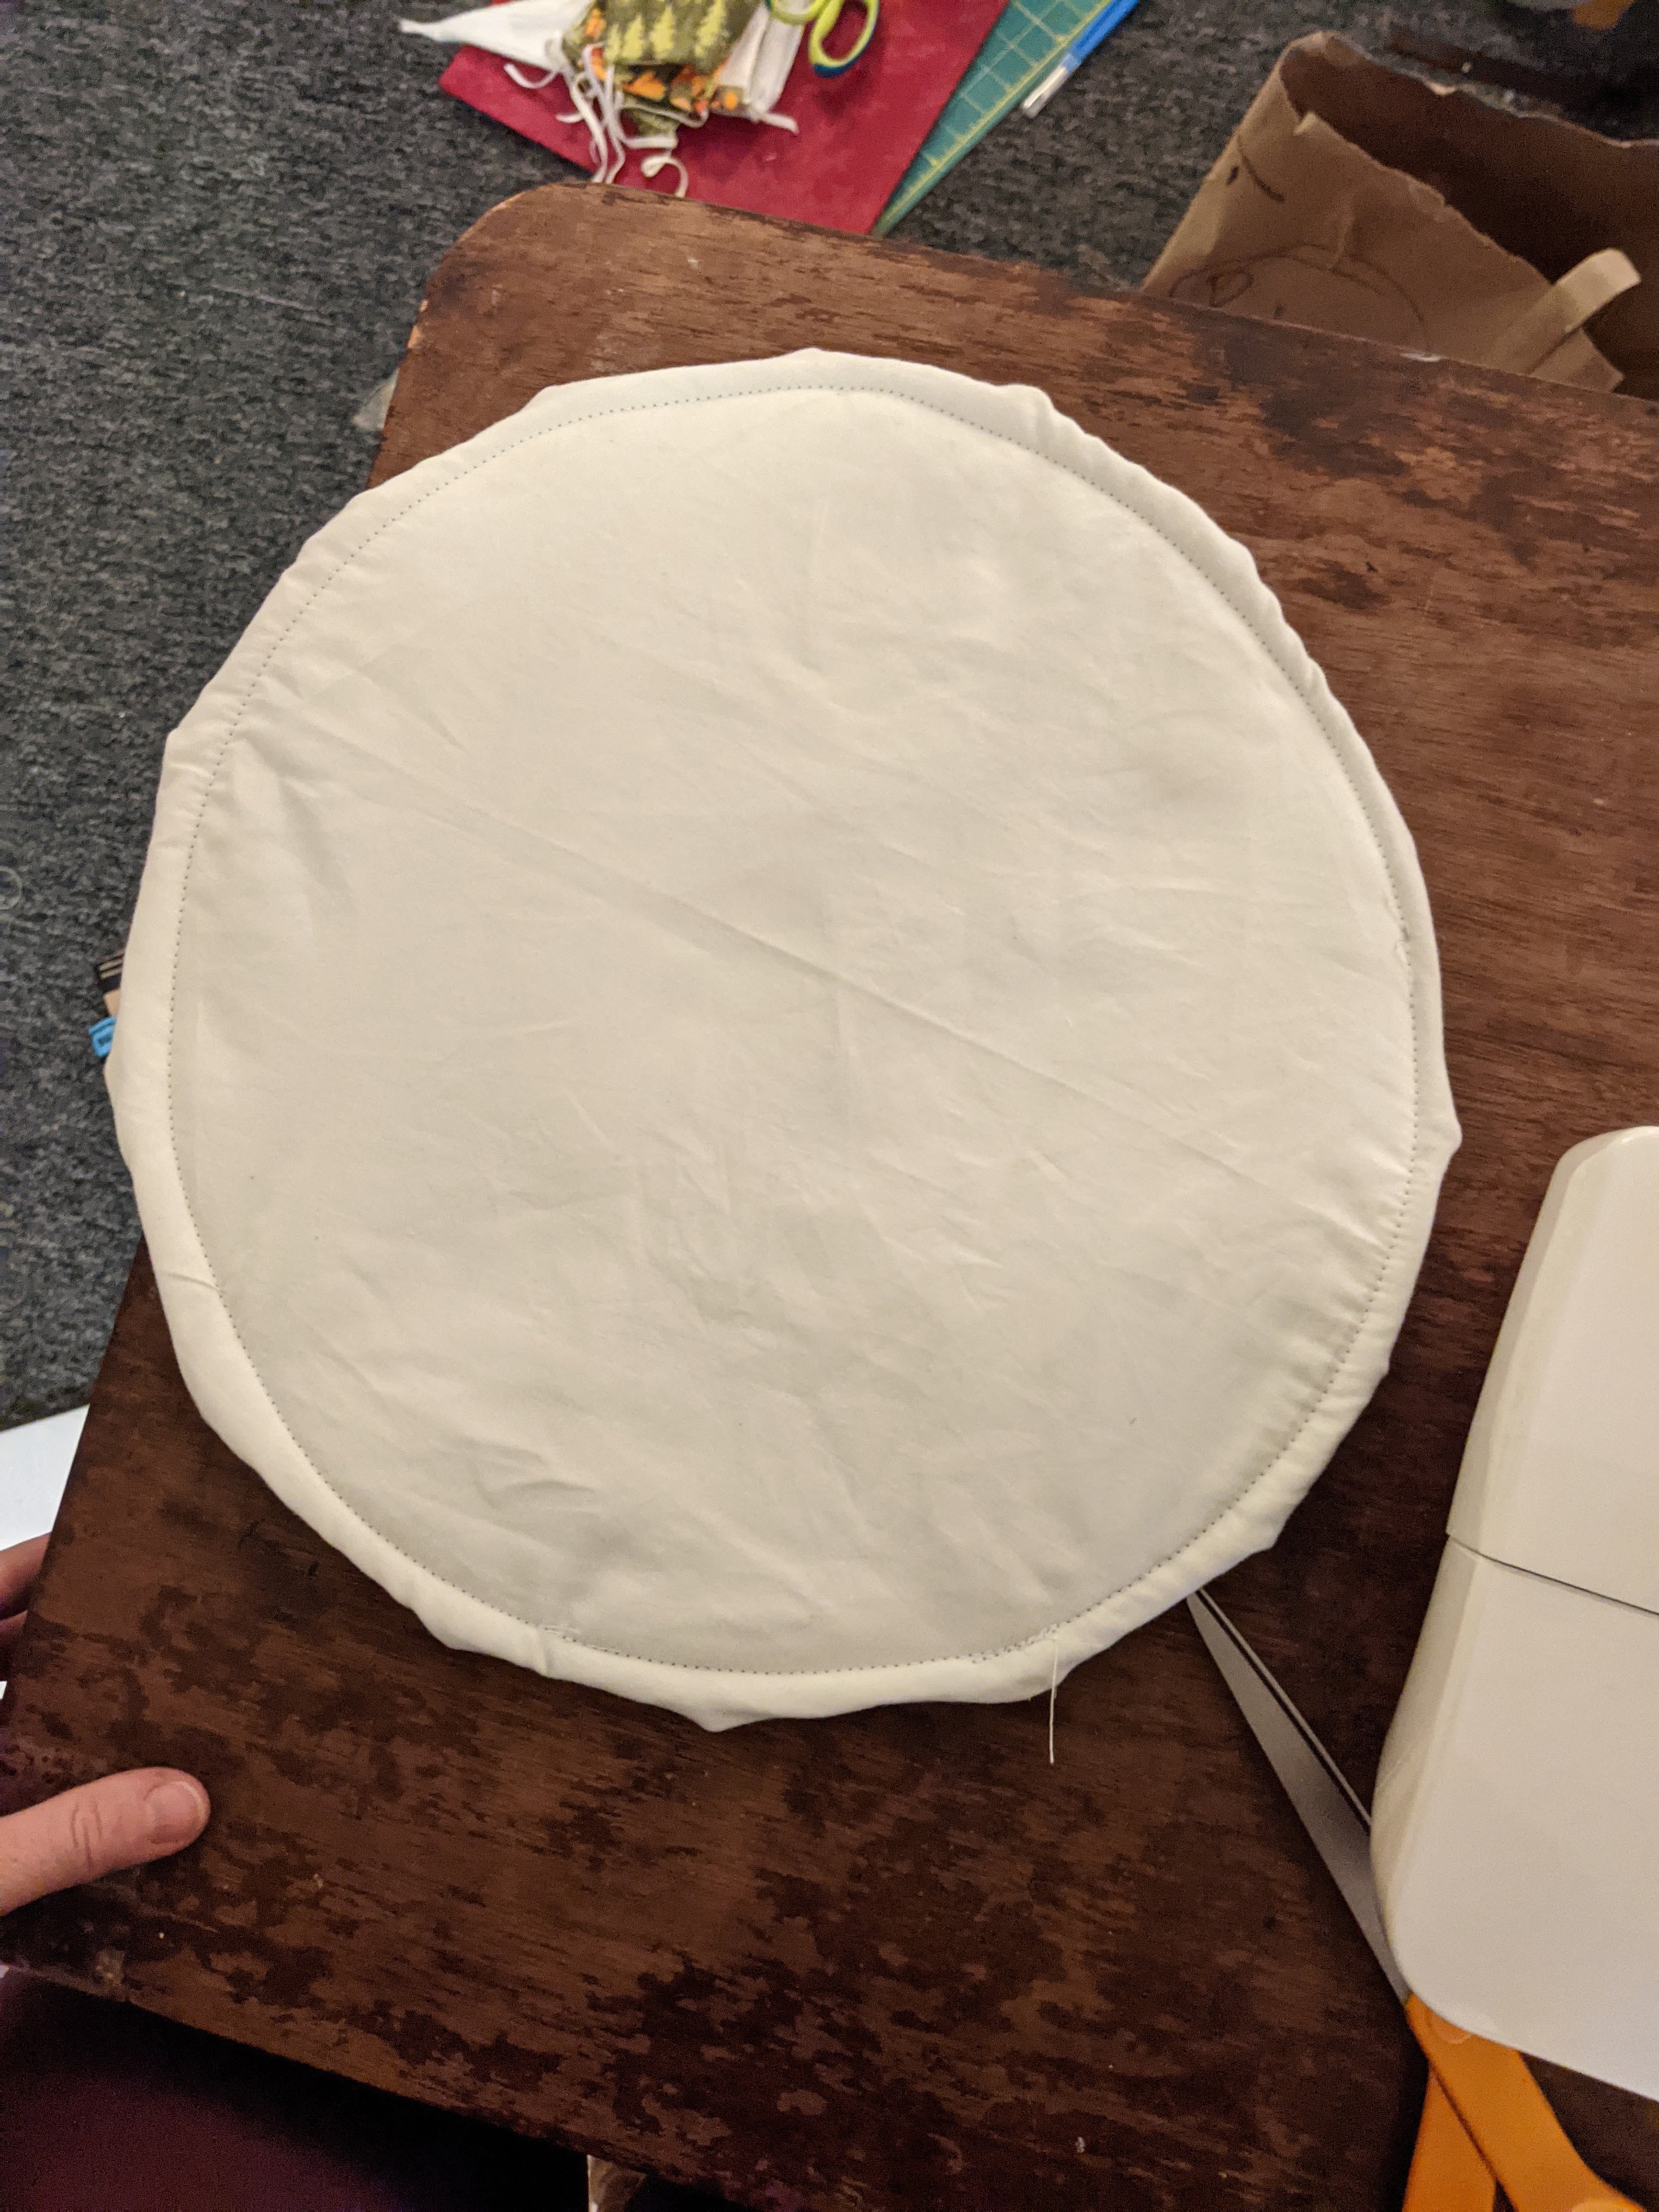
For the round windows in the back of the van, I decided to make two types of coverings for each window. The first type I made were simple, round inserts. I made these maybe 1/4 inch larger than the windows themselves so they fit snugly inside. The fabric for the right side was cut a little larger (probably larger than I needed to cut it), folded over and clipped in place, then sewn on by just topstitching around the edge, about 1/4 inch in. These will hardly be visible, so I wasn’t too concerned with how they look.


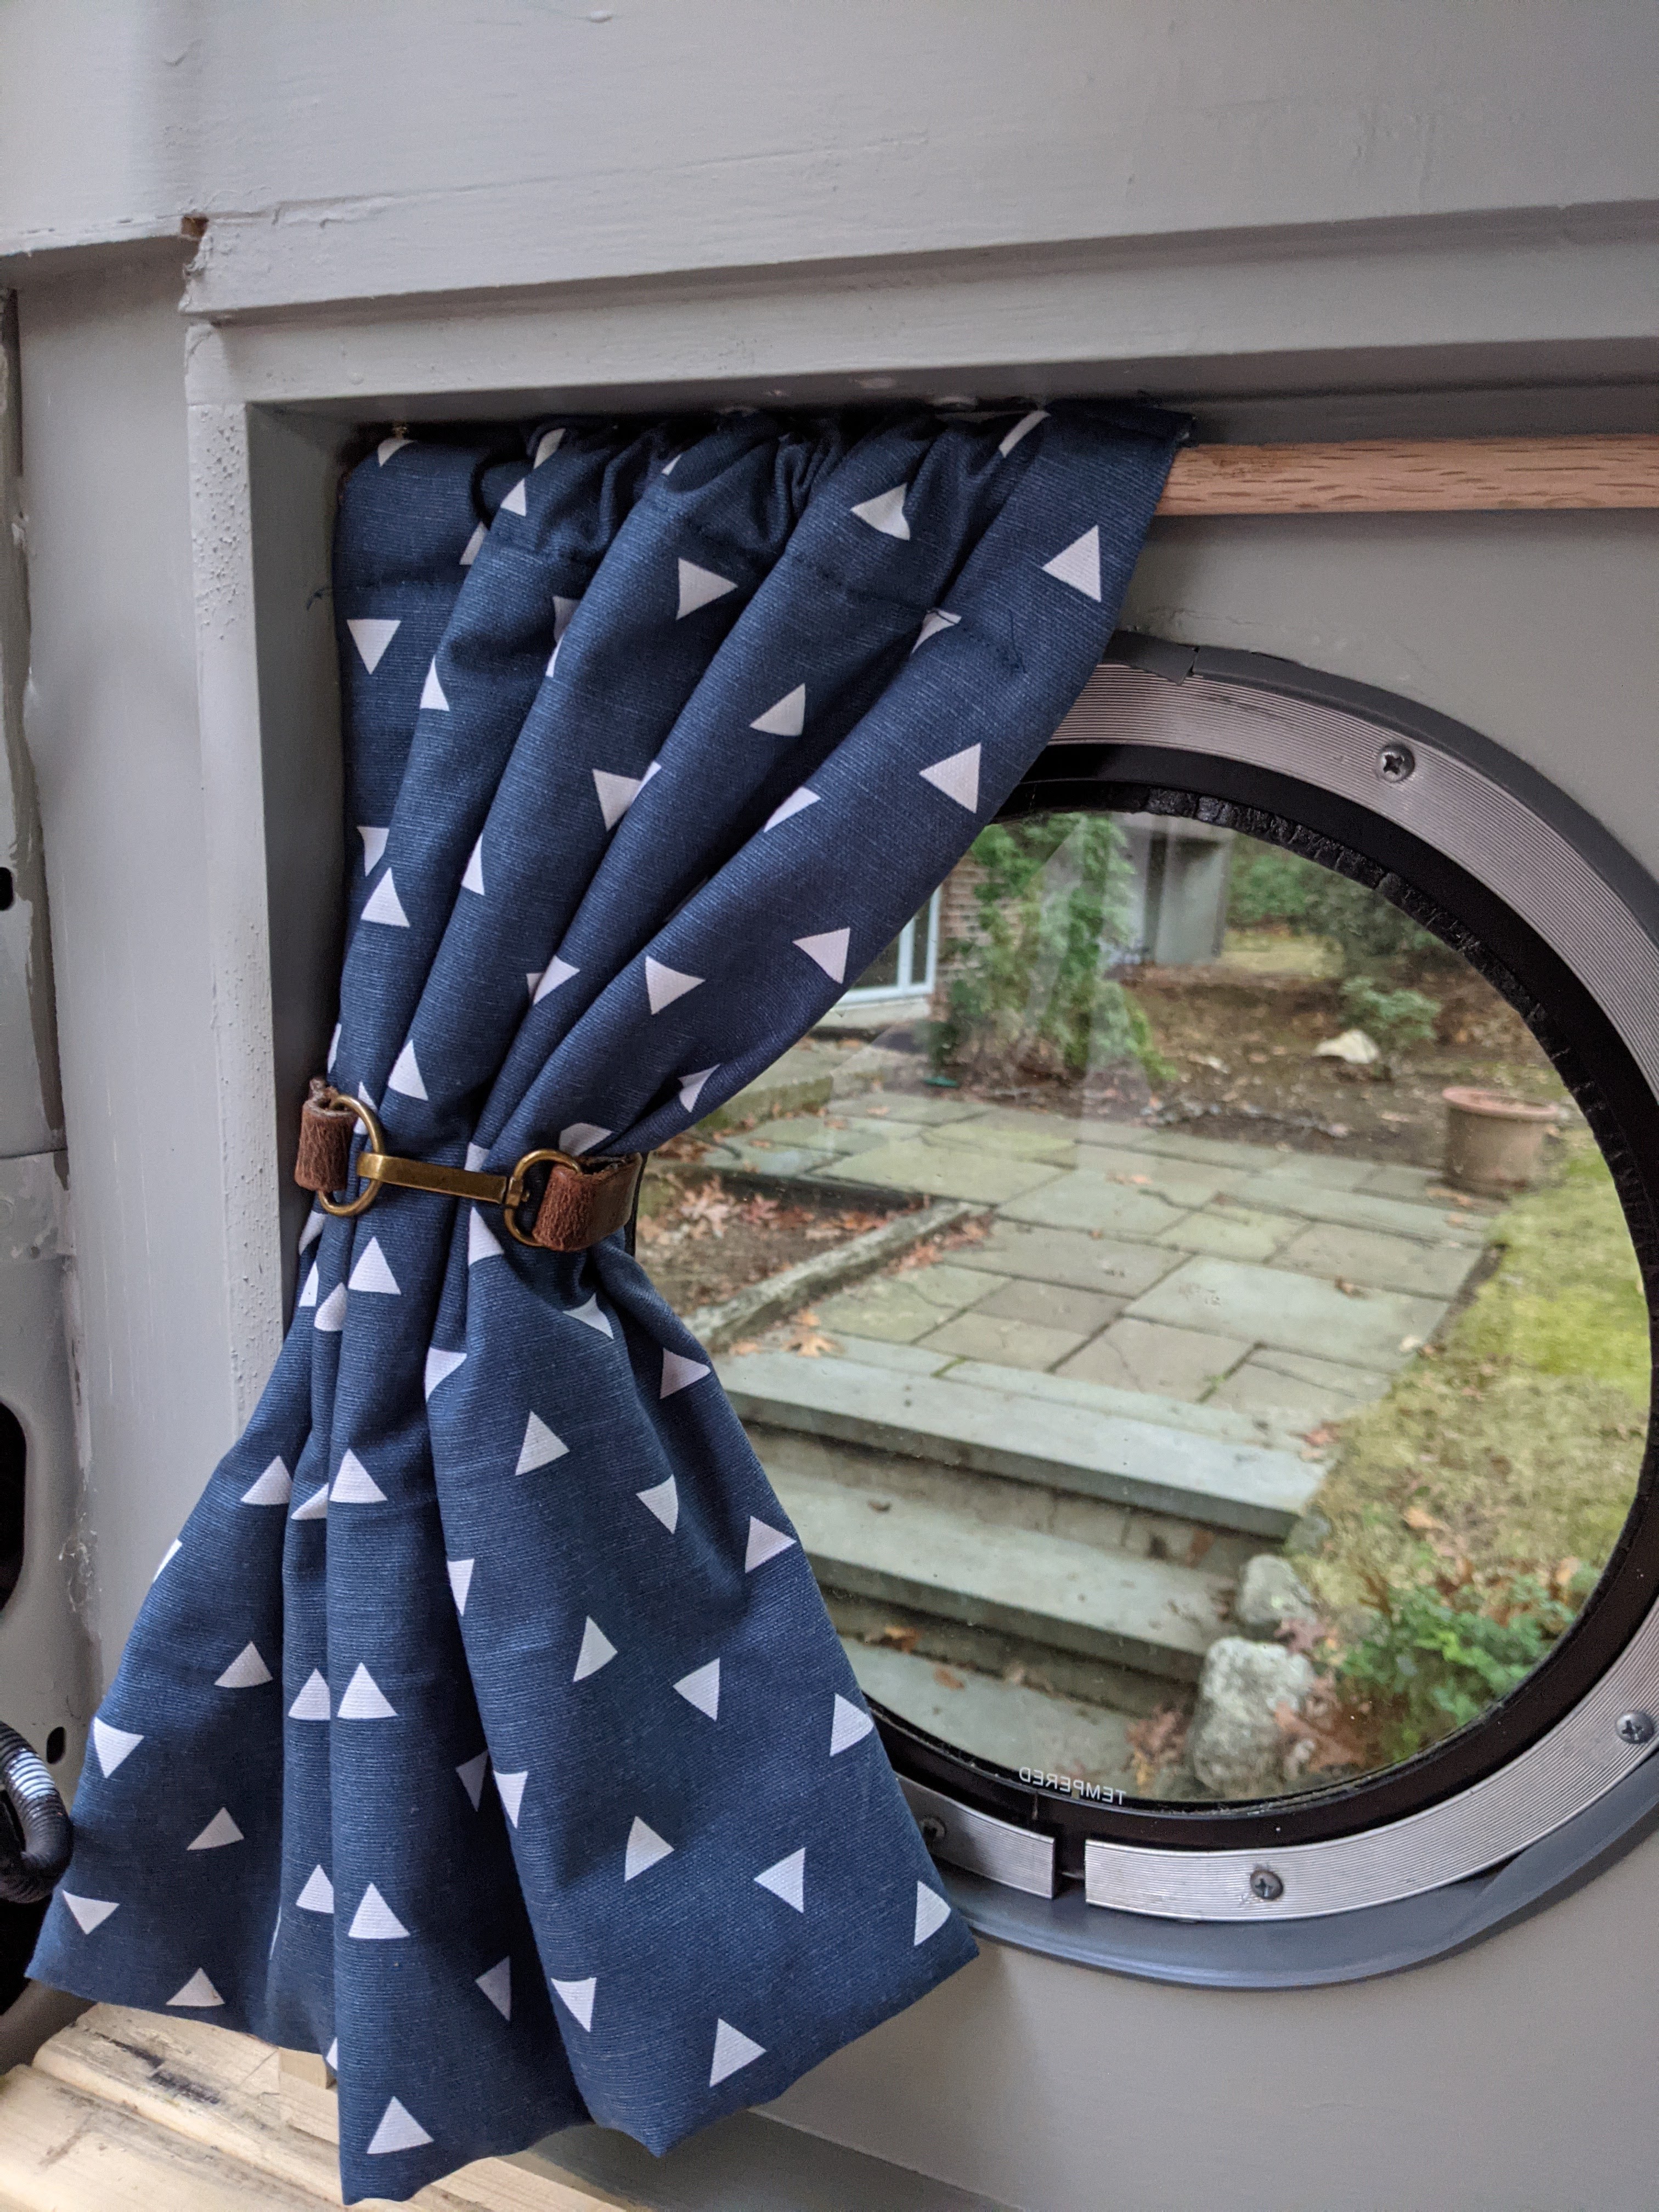
By far, my favorite window coverings in the van are the little curtains I made for the back windows. The round inserts are purely functional, they block most of the light and most of cold, but I wanted something that looked nice to go along with them. These curtains are the last ones I made, and I had enough of the thermal backing left over that I ended up using it for these as well. The doubled up thermal fabric ensures that if we’re staying somewhere with cold nights, or we want to blackout the van so it’s not as obvious we’re living in there, we don’t have to worry about light and/or cold drafts from the windows around the bed. If we’re staying somewhere those things aren’t as much of a concern, we can forgo the inserts.
I made these curtains the same way I made the large one, but with the thermal fabric going in the other direction so these can be tied to the side. The night I made these I was so exhausted I sewed the first one wrong three times. What’s worse is I had been taking pictures of the whole process, making sure to get every step, and I still managed to make the same mistake thrice over. Go me.


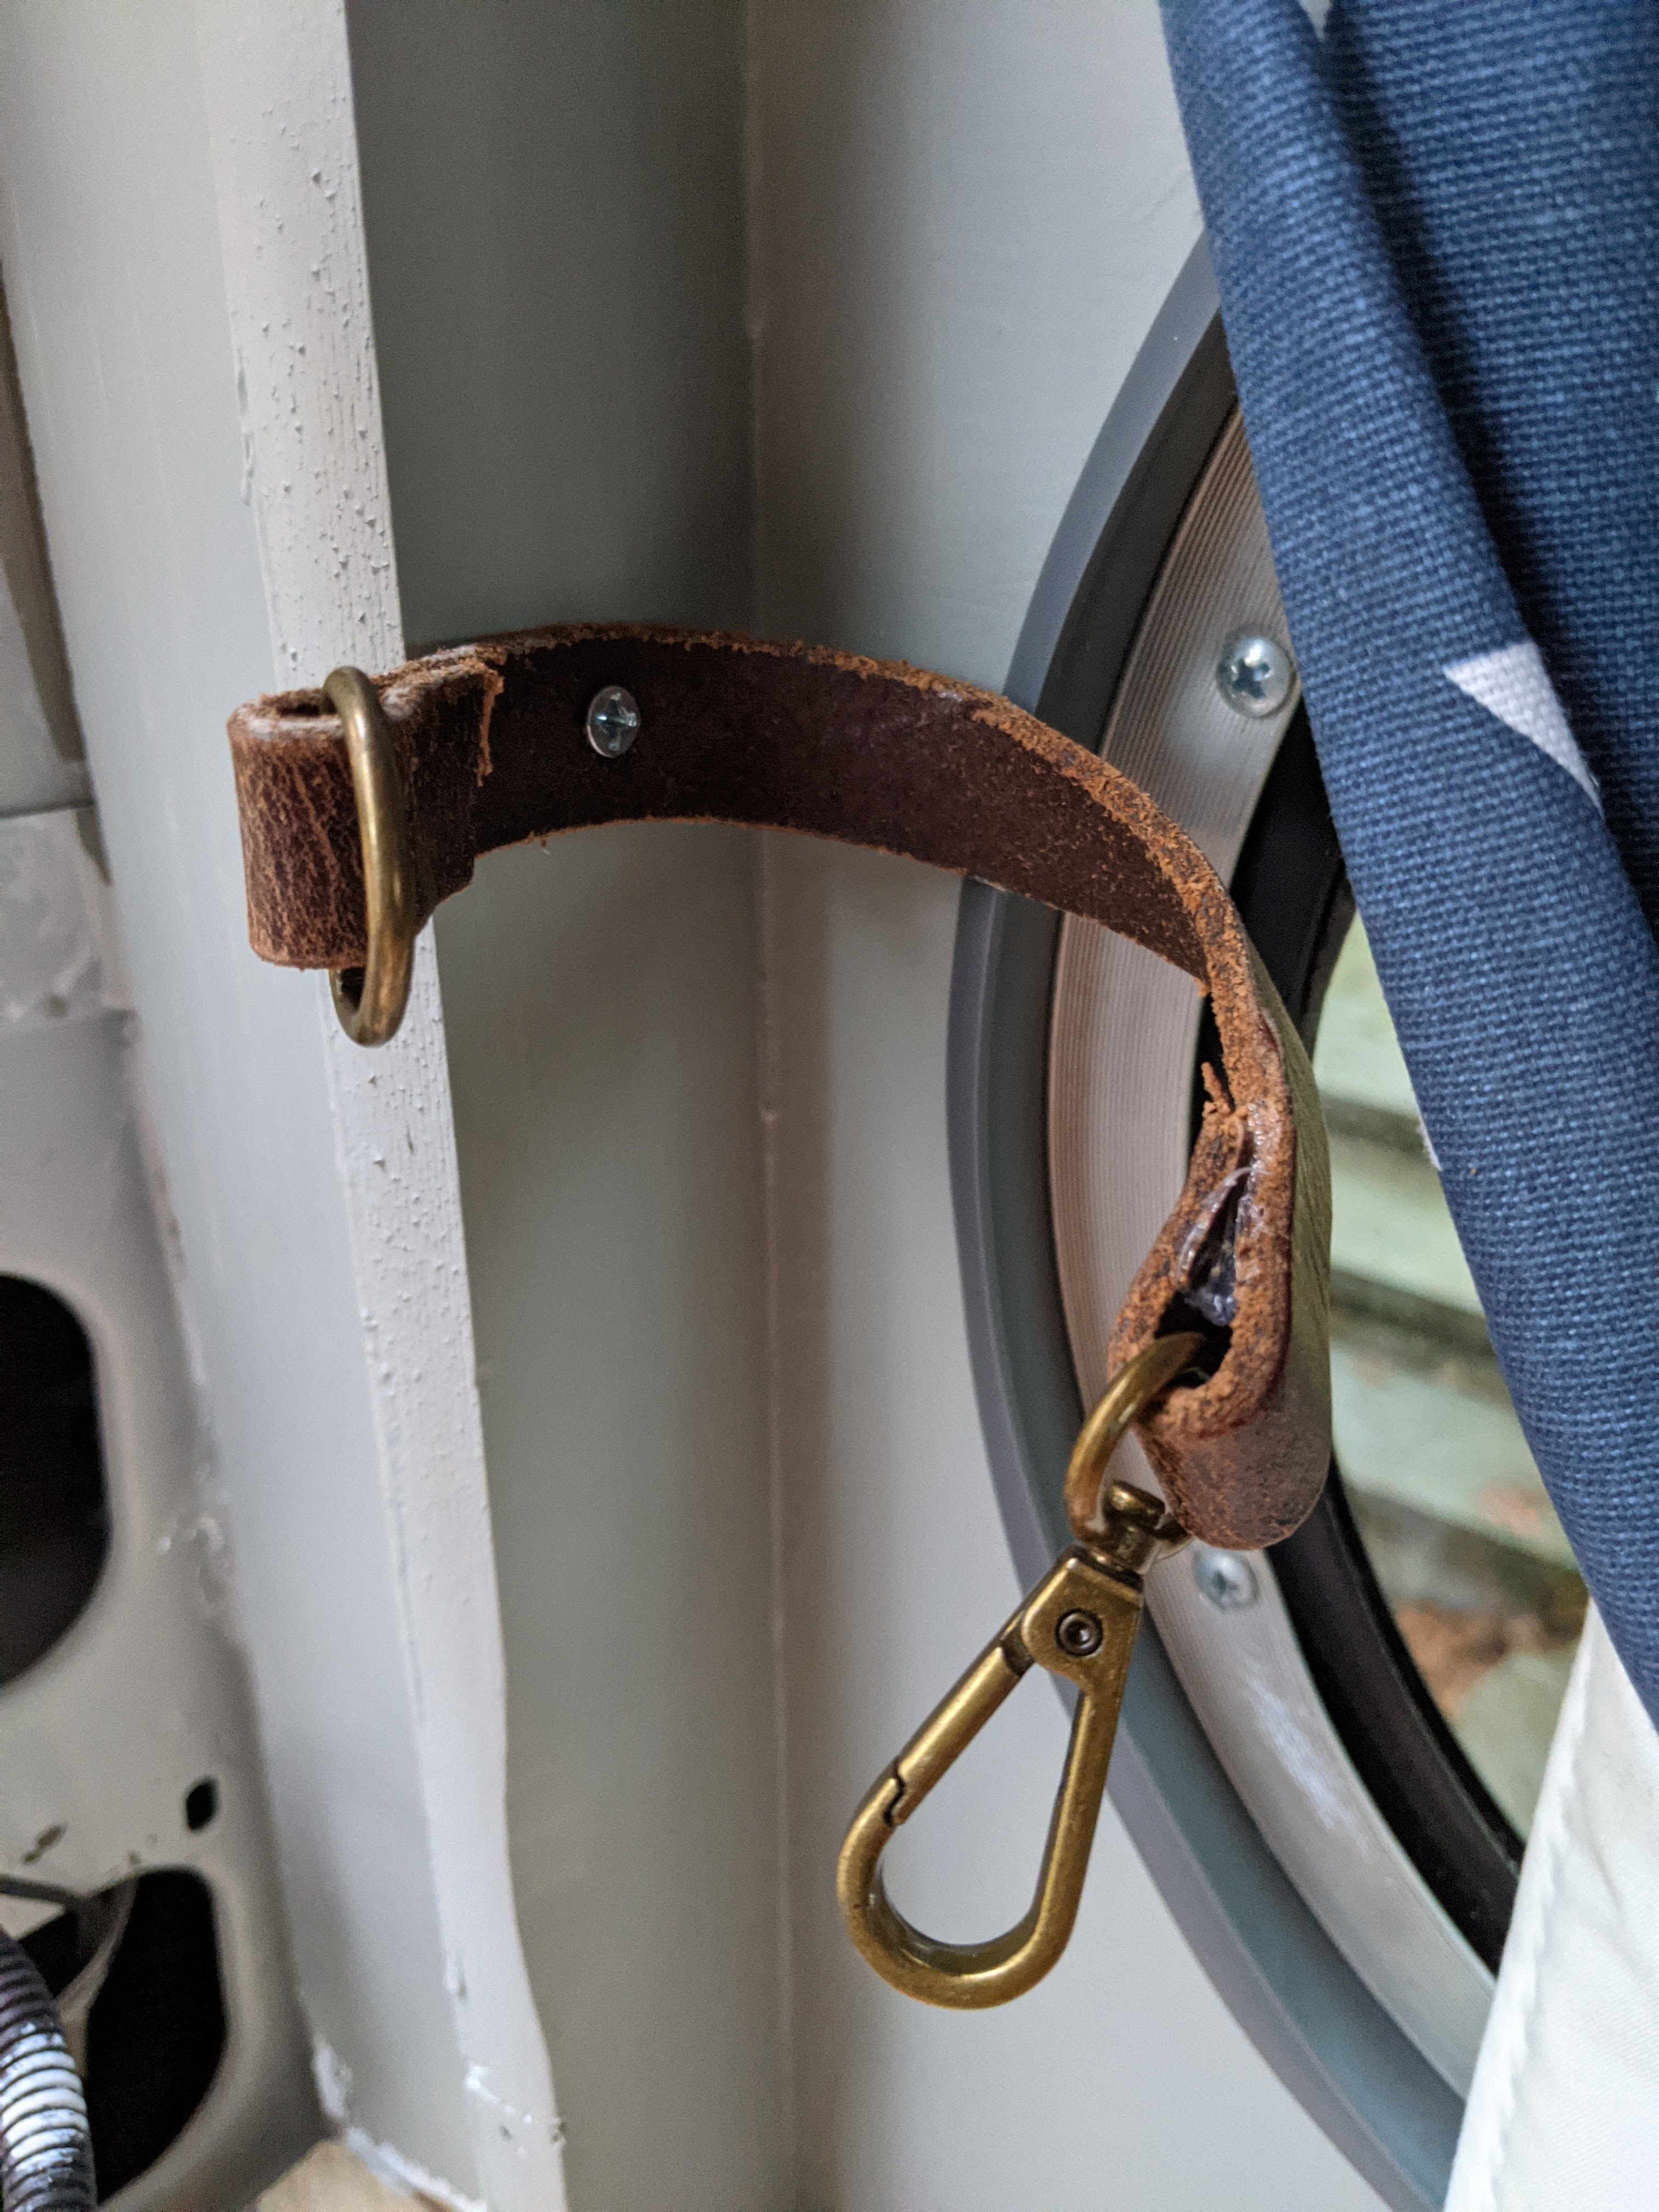
Now for my favorite part; remember that thrift store leather belt I used on the kitchen cabinet? I used the rest of it to make tie backs, and even though it’s such a small thing, these are absolutely one of my favorite details in this build. Our “curtain rods” for these are simply wood dowels hung in brass cup hooks screwed into the wall.

Although we haven’t slept in the van yet, based on the few times we’ve closed it up while we’re working inside it these curtains seem like they’ll be just as effective as we’d hoped. Plus, along with the back splash, these are one of the first real personal touches we put in the van and didn’t immediately have to take back out, so they’ve gone a long way in making the space feel more homey and ours.

Annie! I am, as always, delighted and impressed with your blog post. But, hey, now—You’re working on curtains in Maine next week? I.E., Christmas week? You better believe your mother will be happy to pitch in! Have a wonderful family holiday! Love and Merry, Merry from Assad and me. 🎄🌟⛄️
LikeLike
That’s the plan! I’ve heard that sewing all the little rings on can be tedious, but it seemed like a good quarantine activity. I hope you all have had a wonderful holiday as well, lots of love ❤
LikeLike
Imbso grateful so for your detailed description.
I’m working on ideas for a curtain for my back double doors to this renovated horse trailer. I don’t want people to get an eye full when I open the back doors. It is insulated but I’m still h it and Ann hoping to find material with insulation or just insulation. Hope you are still enjoying van
LikeLike